The PACS Server
![]()
The PACS Server
![]()

To add a device, select the Add device  icon.
icon.

| Field | Description |
| ID | Label used to uniquely identify the device |
| IP/Host | The IP address or host name of the device. If the value is a host name, such as server.hospital.com, and the IP address changes, click the Refresh IP Addresses link at the bottom of the Devices table to update the host names with their current IP address |
Note: Registered viewer workstations having a fixed IP address or defined computer name can use the auto-routing function.
| Setting | Description |
| Port | Port address of the DICOM application required when the device accepts Association requests. These TCP Port values are listed in the DICOM Server Settings. |
See: DICOM Server
TLS connections support DICOM Security Enhancements. TCP connections are for default DICOM and Web Services communications
| Setting | Description |
| TCP port | Port number for non-secure DICOM communications over TCP. To disable (non-secure) TCP connections, set the port number to zero |
| TLS port | Port number of secure DICOM communications over TLS. TLS connections support the DICOM security enhancements protocol. To disable TLS connections, set the port number to zero |
Updating the configuration of any Parent- or Child-type server requires each server be updated. After updating the device table on every EP server, update the information in the DotCom configuration file by clicking Recollect Dotcom Info at the bottom of the Devices table on every server in the EP hierarchy.
| Type | Description |
| Backup Source | A device that sends data to the Backup Target device |
| Backup Target | A DICOM-compliant device intended as an offline data backup server |
| Child | A PACS child server |
| DICOM | A DICOM entity. Assign the supported DICOM services on the DICOM Device Settings page |
| Media Creator | A PACS standalone media creator server. |
| Parent | A PACS parent server |
| Viewer | A PACS workstation, specifically one using workstation prefetch (aka Auto Routing). |
| Web Service | Interface for external products to communicate with the PACS server and access many of the functionality that is available through the Web user interface |
After adding a device to the device table with Type set to DICOM, the DICOM device setup page appears. On this page, enter the DICOM-specific configuration for the device plus the data coercion rules applied to objects received from this device. Administrators can limit the maximum number of outbound send tasks and inbound registration tasks associated with a specific device. These typically do not require changes. To change the settings from this page, in the Task Limits section enter values into the following fields, as needed.
| Type | Description |
| Categories | Maximum number of connections all members of the Category can have established at any given point in time |
See: Categories
Coercion adds or modifies attribute values to objects when acquired by the system, including acquiring from a networked device or scanner, or transmitted to the viewer.
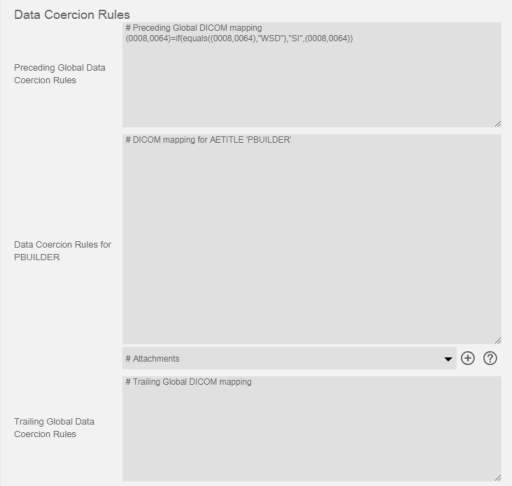
To define device-specific coercion rules
Go to the Devices page
Click to edit the device you want to configure. For scanning, create and use the Self device.
In the Data Coercion section, type one or more commands into the text box. If needed, select DICOM tags from the pull-down menu and click Add Tag.
Click Save.
Coercion rules do not propagate between linked servers.
Coercion works for DICOM alpha-numeric attributes only.
Coercion rules apply to all DICOM C-STORE messages arriving from the device. Multiple rules can exist for a single device. They are applied in the order used in the definition list.
Coercing data elements may impact the DICOM compliance of an object, and may lead to inoperability in the system and third party systems. If unsure of the effect a coercion rule will have, contact support for guidance.
The Self device is used in specific situations to refer to the server. To add a self device, select Admin/Devices and select the Add device icon.
To add a Self device set these parameters:
When all parameters are selected, click the Confirm  icon.
icon.
*For all values listed in DICOM Server Settings see: DICOM Server

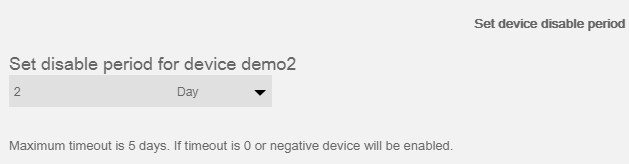
To disable a device:
icon icon .
To enable a disabled device:
again button iconNote: When a device is temporarily offline, it is better to disable it rather than delete it and all the configuration information from the Devices table. Users with support rights have the ability to temporarily disable a device.

To delete a device:
iconAfter deleting a device, rebuild the DotCom information by clicking the Recollect DotCom Info link on every server in the PACS hierarchy.

To edit a device:
Find the device to edit
Select the Edit icon
Make any necessary changes
Select the Confirm icon

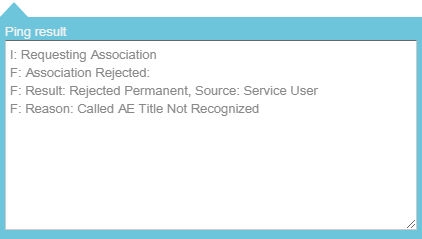
To confirm communication between the PACS server and another device, issue a ping command or a DICOM Echo request from server. Select the Ping icon to execute this action and reveal a Ping result dropdown: