 PACS
Desktop Viewer
PACS
Desktop Viewer
PACS
Desktop Viewer
Creating a report means entering text or a recording to a report, attaching a key image and changing the study state. To create a report you must have report editing and possibly dictation privileges. If the report panel has fields to allow editing, you may not have the requisite permissions and would need to speak with your system administrator to change the settings on your account.
To create a report:
A report may consist of an observation, an impression, addenda, key images, and the dictated .wav data. Any one of these components makes a report, although a report can consist of all of them. Creating an observation, impression, addendum and a dictation are described in the following sections.
Text Reports
For text report in the report panel:
Default report format
Contains an Observation section
Click in the window and type to enter text in either field
Notes
Contains radiologist notes
Entered by and displayed for users with notes privileges
Other users do not have access to the contents of the Notes field (physicians, techs, etc)
Used for submitting comments to the radiologist
If note exists and Impression and Observation fields are empty, note appears when the study is loaded into the viewer
Clear the Show Report Note setting on the Settings page to disable
Can be edited any time prior to signing the report
Formatted Text
The Observation and Impression text fields support rich text. The available tools include text font type and size, bold, italic, underline, strike-through, superscript, subscript, text alignment, bulleted and numbered lists, indentation, color, separator and tables. Rich text fields expand dynamically as you enter text.
Spell Checking
The viewer supports spell checking with:
To use the spell checker:
Normality Flag
The normality flag allows a user to tag a report so the study is visually highlighted on the worklist. To set the normality flag to Alert, clear the Normal flag field on the report panel. The presence and label of the normality flag on the report panel is configurable. It is a server setting, editable by the system admin. Refer to the Server Configuration section of the Operator’s Manual for more details.
BIRAD Values
BIRAD values can be assigned to a study in the report, but are only displayed for mammography images. To assign a BIRAD value to a report, open the Report panel and use the drop down box to select a value. Accepted values are n/a, 0, 1, 2, 3, 4, 4a, 4b, 4c, 5, and 6. BIRAD values are displayed on the worklist if the column is included in the layout. User can search for studies with a defined BIRAD value.

The user is able to create a collection of predefined reports that can be applied in place of dictating a report or typing a custom report. Each report template belongs to a user’s profile and can be defined as a general template or a modality-specific template.
Fields making up a report template:
To save a report template:

When a study is loaded into the viewer, canned report templates with the same modality setting are combined with the general canned report templates into a single list. If multiple studies with different modality values are loaded into a single viewer session, templates for all modalities plus the general ones are available in a single list from the toolbar.
To apply a canned report to a study:
To update a canned report:
To delete a canned report:
Marked text delimiters:
System default delimiters are defined on the server’s Settings page.
Dictations are recorded in the viewer using any Windows compatible microphone and sound card. Dictating a report requires dictation permissions.
The recording controls are located in the Audio menu (highlighted) located in the Report Panel:
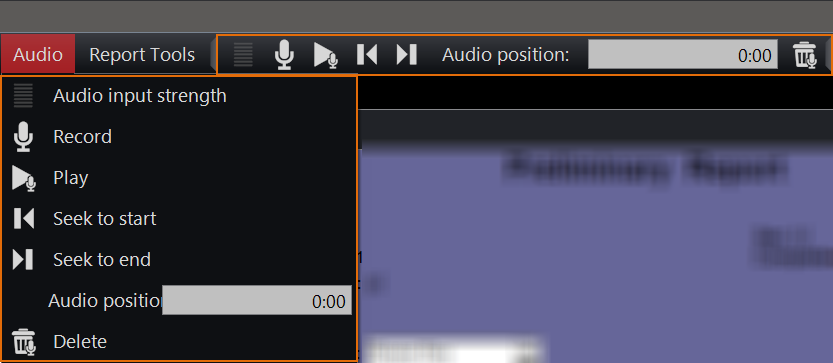
Recording controls:
To start recording a dictation:
To remove part of a recording:
Note: It is not possible to delete any part of a dictation if the report component (observation, impression or addendum) has been approved and is in the Final state.
If multiple studies are loaded in the viewer when dictating has started, the viewer will prompt the user to select the report to dictate into. By default, the system chooses the report that corresponds to the primary study, which is the first study listed in the thumbnail panel.
If dictating has started when the selected image frame is from a study other than the one previously selected, the viewer prompts the user to confirm they are dictating into the correct report.
To disable the study selection prompt:
Select the Select primary study as default option in the Settings panel
Choose the study you want to dictate
Click OK
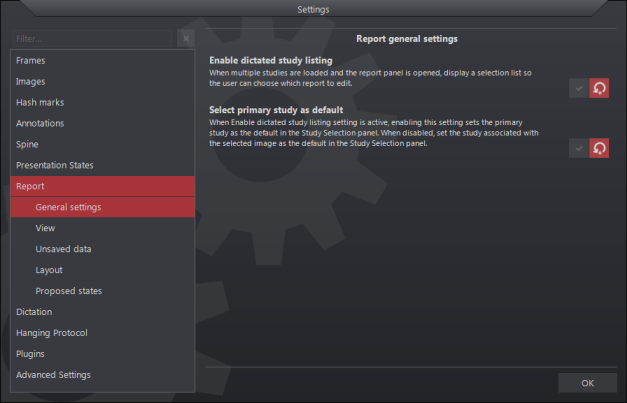
Select the Enable dictated study listing option in the Settings panel for a list of studies to appear in the report panel.
Speech Recognition and External Reporting Systems
Speech recognition (SR) converts spoken language into edit-able text without manual transcription. Instead of using a keyboard to type text into an editor package, the user talks and the words appear in the text area. The converted text has the same properties as text entered manually. Optional embedded SR support is provided, in which the SR tools are integrated into the viewer's basic reporting function. For users running an integrated reporting application on the workstation, an optional interface is included to use as an alternative to its embedded solution.
The embedded speech recognition functions are:
Select a link above more information.
Correct or modify approved final reports from the report panel by attaching an addendum to the report. If a report or an addendum is unapproved, it is able to be modified. When a report or addendum is in the Final state, the text is not edit-able and a new addendum section appears on a separate tab in the report panel (highlighted).
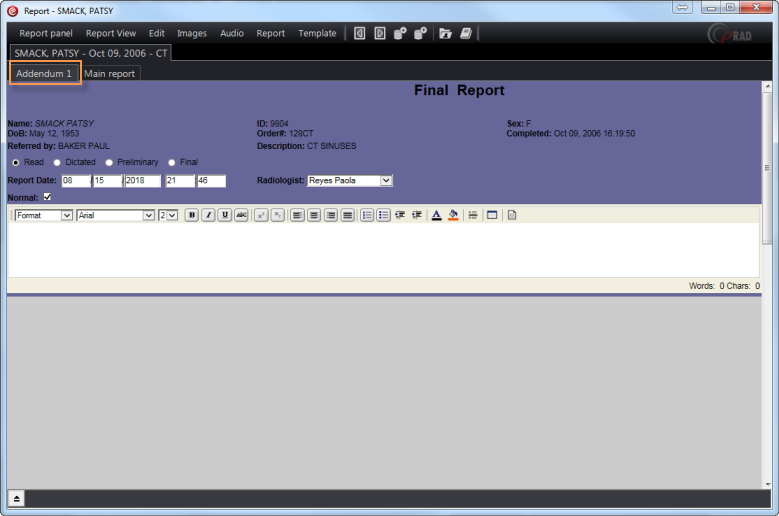
To add the new addendum:
Disable this warning permanently by checking the Don’t show this warning again box. This can be enabled again in the Settings panel under Frames/Warnings. Select the Dictate to addendum option item on the menu to clear (highlighted below).

To play back an addendum’s dictation:
To restore a report:
Use the second method of restoring when: