 eRAD
PACS Server
eRAD
PACS Server

eRAD
PACS Server
The Worklist consists of a table listing orders, studies and reports currently available in eRAD PACS. The default worklist page contains the worklist table and the tools used to display images, manage orders, edit patient demographics, view reports, and forward studies. The worklist section also provides access to user-scheduled action settings, manual correlation of orders and images, transcription services, and DICOM media creation.

To access the worklist,
select the Work List  icon. A drop down appears containing the different worklists that can
be accessed, with the first (Worklist) already having appeared. If
another menu item is open (eg., Dashboard, Admin), selecting an icon will
automatically open the first option available.
icon. A drop down appears containing the different worklists that can
be accessed, with the first (Worklist) already having appeared. If
another menu item is open (eg., Dashboard, Admin), selecting an icon will
automatically open the first option available.
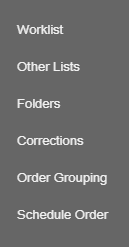
For further information on the other sections please see:
Located at the top left
corner of the Server page is a Lists
 dropdown.
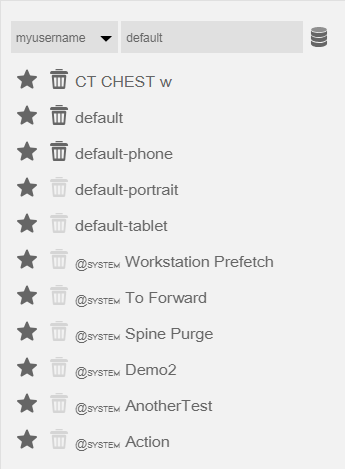
This contains all of the saved lists of studies created by the user as well as user group lists. System worklists are available for users with administration rights.
To create a worklist:

For more information on setting worklist filters, see:
To delete a worklist, select the Delete  icon. Select
the icon a second time before the countdown finishes to complete action.
icon. Select
the icon a second time before the countdown finishes to complete action.
There are tool icons that perform various functions for an individual
study. Based on the user right permissions, all available tools can be
accessed by selecting the checkbox  .
When formatting the worklist, the Admin should take into consideration
the users and groups accessing the studies. Admins may configure these
worklists to suit the users' needs. Each worklist can have its own tool
icon configuration which can be added or removed in the Edit Layout page.
.
When formatting the worklist, the Admin should take into consideration
the users and groups accessing the studies. Admins may configure these
worklists to suit the users' needs. Each worklist can have its own tool
icon configuration which can be added or removed in the Edit Layout page.
See: Editing the Worklist Layout

 - Delete study (Delete
Study)
- Delete study (Delete
Study) - Forward study (Forward
Study)
- Forward study (Forward
Study) -
Edit study (Edit
Study)
-
Edit study (Edit
Study) - Split study (Split
Study)
- Split study (Split
Study) - Open in web viewer
 - Open in desktop viewer
 - Open in desktop viewer with priors
 - Scan attachment (Scanning
Documents)
- Scan attachment (Scanning
Documents) - Upload attachment (Uploading
Documents)
- Upload attachment (Uploading
Documents) -
Approve (Approving
Reports)
-
Approve (Approving
Reports) - Technologist view
 - Not locked
Web
Viewer
- Not locked
Web
Viewer
Desktop
Viewer with Priors
To the right in the list item are two indicators indicating whether a patient has a single study or multiple studies.
 - patient has multiple
studies available
- patient has multiple
studies available
 - patient has only one
study available
- patient has only one
study available
Clicking anywhere on the list item expands the patient worklist folder with all associated studies.
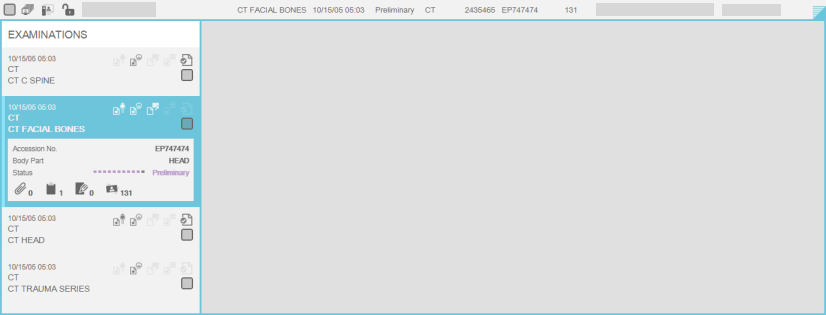
Within the patient folder are a number of relevancy icons indicating study attributes:
 - contains same body part
 - contains same modality
 - contains key images
 - matching by relevancy rules
 - contains final report
Relevancy icons from other studies adjust to match the selected study.
When a study is selected it is highlighted in blue:
A light blue color indicates the study relevancy in comparison to the other studies.

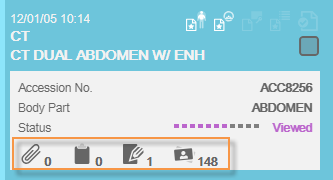
Icons located in the patient study area can perform various functions such as pulling up images, attachments and reports.
 - attachments - view any
available attachments
- attachments - view any
available attachments
 - reports - view any available
reports
- reports - view any available
reports
 - notes - adds a note to
folder
- notes - adds a note to
folder
 - images - view images
(opens up a web viewer within the worklist)
- images - view images
(opens up a web viewer within the worklist)
Note: Administrators are able to delete notes.
The Copy to clipboard function will copy that particular value to the computer's clipboard. This is located by right-clicking anywhere on the patient studies in the worklist and selecting from the window.